Resource scheduler
The resource scheduler is your board to coordinate what is to be done on your leading resources. It provides a quick overview over your most important resources and the activities which are planned or need to be planned. You can quickly change schedules, inspect and revise key activities or just gradually build up your daily / weekly or monthly plan out of a pool of activities.
Starting
The resource scheduler is available in the menu bar below the scheduling symbol.
Starting the resource scheduler
Generally you have to options to start a resource scheduler
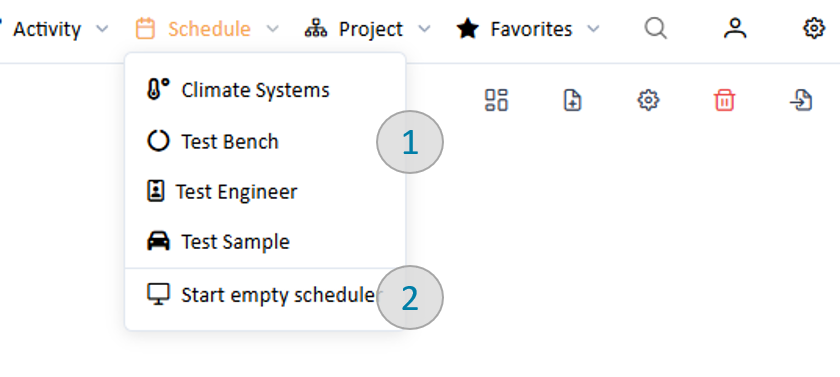
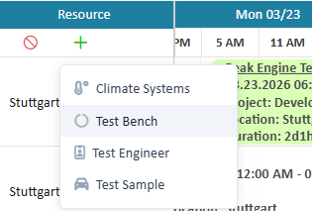
Option 1: Start a scheduler for a specific resource type
This is the most common case: For a specific resource type (in the picture above, Climate Systems, Test Bench, Test Engineer, Test Sample) you start directly with a scheduler. The system will display up to 100 resources of this type. Afterward you still can change the resources to be scheduled
Option 2: Start with an empty scheduler
If you want to show different types of resources or there is a huge amount of resources from which you need to filter than this the right way to start: You starte with an empty board and stepwise add resources of whatever type you like for planning.
Resource scheduler layout
The resource scheduler
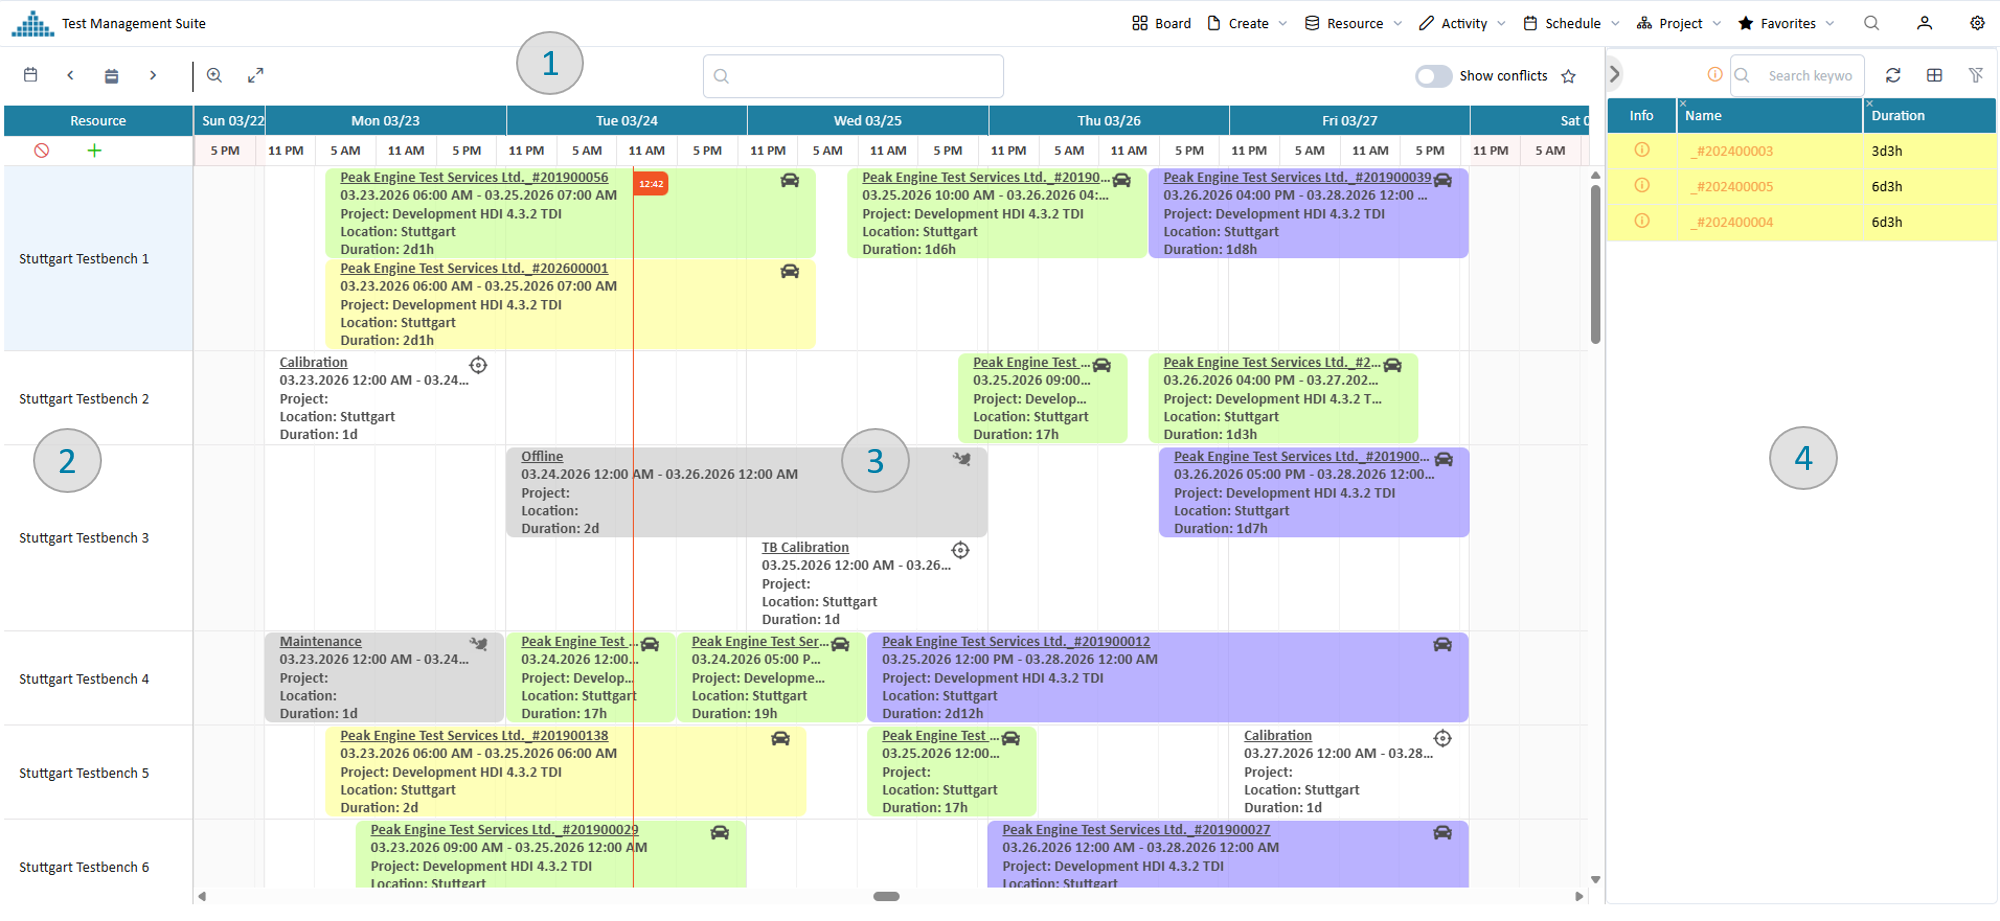
The resource scheduler can be divided into 4 parts:
Toolbar
The toolbar on top provides you with the functionality to specify the time frame of your planning, filter data, change display mode or mange your settings.
Resource pool
The resource pool specifies which resources are planned. Here you can add, remove and reorder your resources so that they fit your planning board. See define resources for planning how to define them.
Planning board
The planning board is the main component. Timelines which display the planned activities on your resources. Here you can change your planning via drag & drop, add and remove activities. Just click an activity and drag it to the desired place. Moving the left and right end of the rectangles allows for changing the length of the activities.
Activity pool
On the right hand side you can open a panel which holds a pool with activities which you can further filter. All of them could potentially be scheduled on the displayed resources. See assign / unassign activities how to use it.
Adjust the planning board
The resource scheduler provides you with many ways to define which planning time you want to see. Here a few use cases
Define the length of the visible time range
You have different options to define the shown time range quickly.
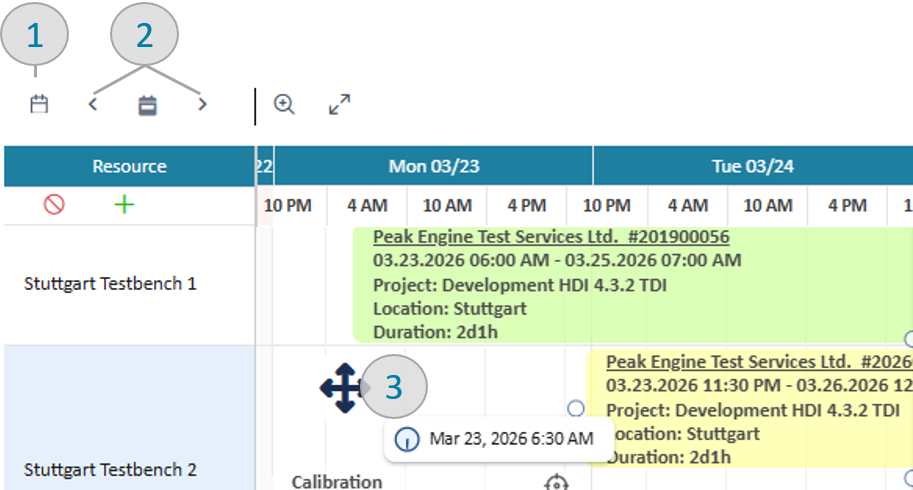
- Option 1: time range button Use the time range button in the navigation toolbar
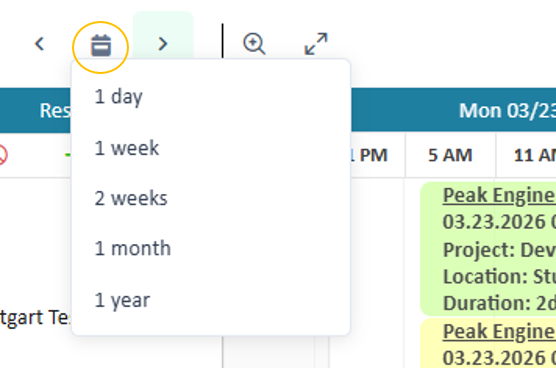
Button to set the time range
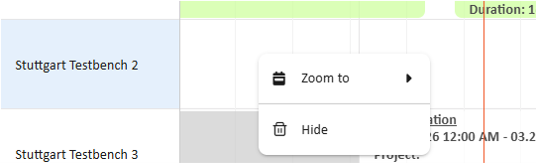
- Option 2: context menu Use the context menu of the right mouse button. The advantage of this approach is, that the time range will be exactly
centered around your current mouse position.
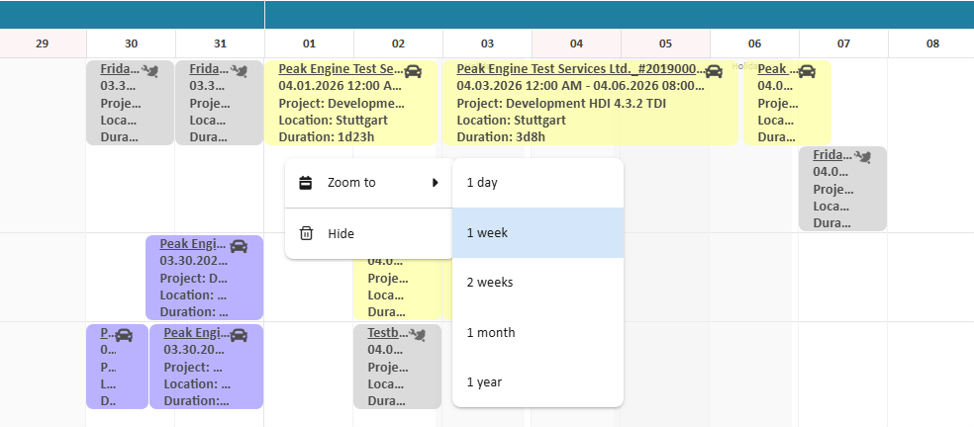
Context menu to set the time range
- Option 3: timeline header Use the header columns of the planning board, e.g. weeks, days or hours. This option only allows to zoom in.

Timeline header to set the time range
- Option 4: Zoom slider You can use the zoom slider in the toolbar to increase / decrease the visible time range.
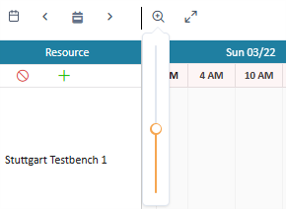
Slider to set the zoom level
- Option 5: Ctrl + mouse wheel You can just use Ctrl + mouse wheel to gradually increase or decrease the visible time range.
Move the visible area
Options to move visible time range
-
Option 1: select date Selecting a date will middle allign the shown range around the selected date.
-
Option 2: forward backward buttons Use the forward and backward buttons to "page" the visible area forward and backward.
-
Option 3: drag & drop Click with the mouse into an area on the planning board without activity and drag the shown area to the desired place
Set the information detail level
The scheduler allows you to define how many details of each activity you would like to see through changing the height of the displayed activities and therefore the size of the render area for information about the activities. For this use the "size" slider in the toolbar to gradually increase or decrease the vertical space which is given to each activity.
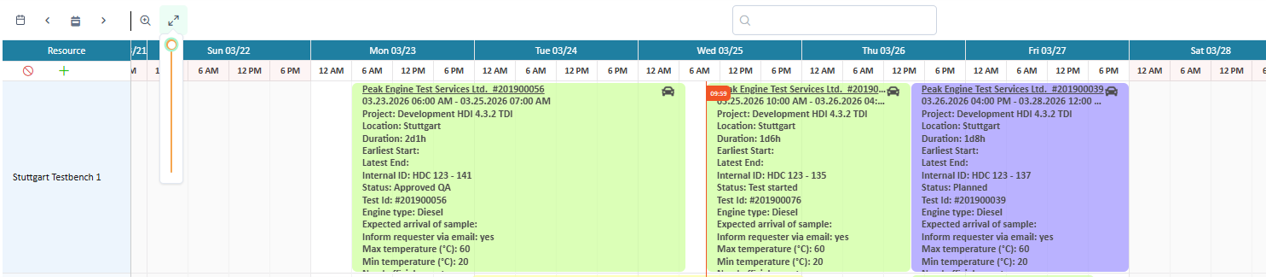
Space detail oriented
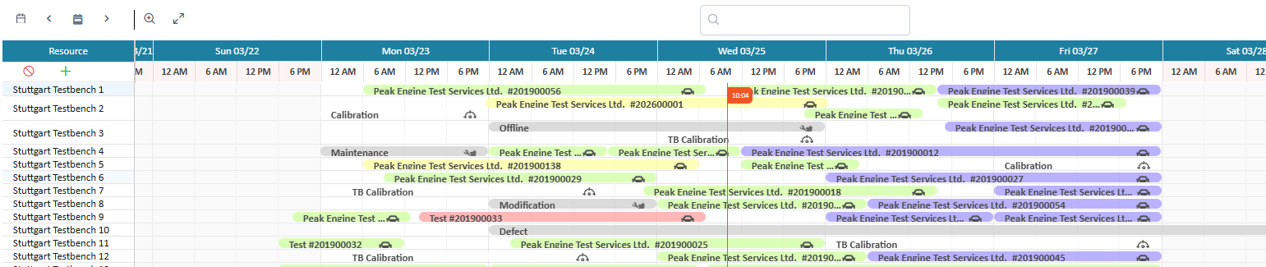
Space overview oriented
Set an activity filter
Within the toolbar you can add keywords into the search field. The application will conduct a "deep" search through all activities and only show matching activities. In the search all fields and resources involved in an activity will be included into the search base.
Define resources for planning
The left panel defines for which resources the timelines will be created.Here several workflows are provided to define your personal resource timelines on the scheduling board.
Empty the resource board
Pressing the button removes all resources from the board and provides you with the possibilty to define your planning resources from scratch.
Add new resources to the board
Pressing the button allows you to add additional resources of a type of your choice.
Add resource choose type
Afterward you can select resources from the give list:
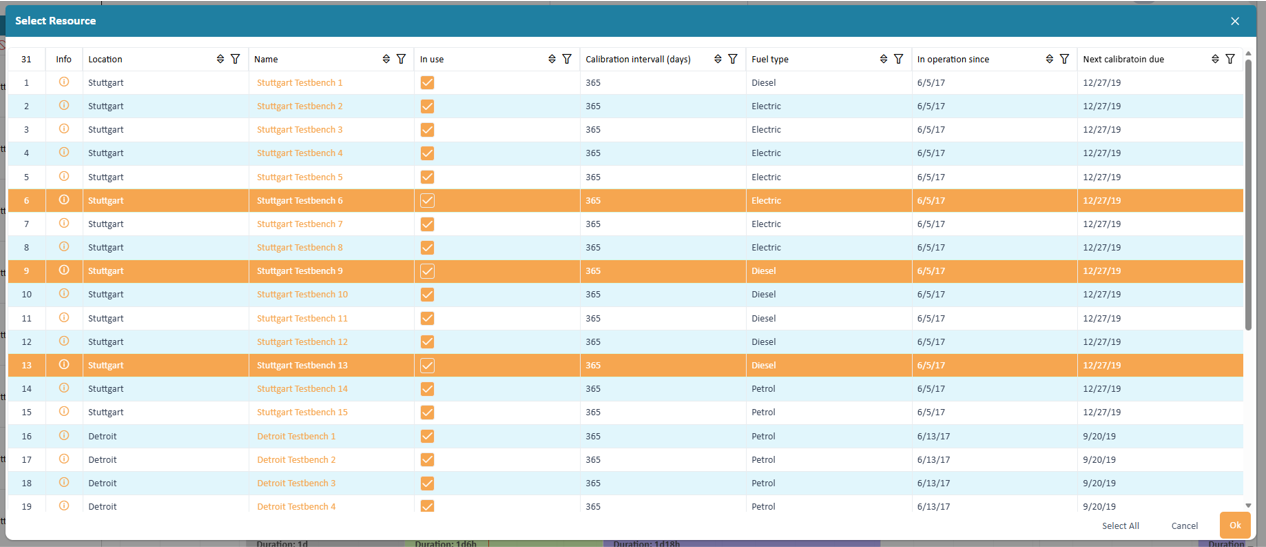
Select resources via multi select
You can either add resources via (multi) selecting (Press and hold Shift) them in the list view or through setting a filter and press the "Select All" button.
Before adding select a resource within the panel; the added resources will be positioned directly underneath it. If none is selected the new resources will be added on top of the panel.
Change the position of resources
You can select one or several (Press and hold Shift) resources in the board and drag them to the desired position. An orange horizontal line will tell you the new position.
Move resources via multi select
Remove selective resources from the board
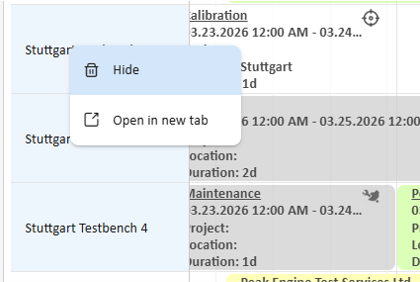
You can remove resources from the board through
- Option 1 select them press right mouse and choose the menu item "hide". With pressing and holding Shift you can also multi select them
Remove resources via multi select on the header
- Option 2 click in timeline press the right mouse key on an empty space in the board and choose the iterm "hide"
Remove resources via click in timeline
Inspect details / edit activities
When you (double) click onto an activity all details will be opened in a new dialog. Read in activity detail page about it. Alternatively you can right click an activity and choose "edit" to get to the edit mode.
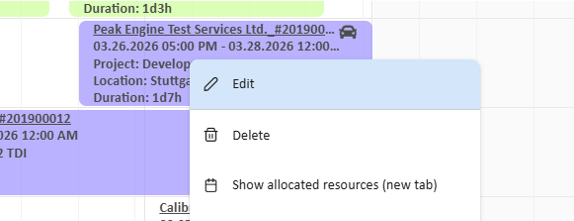
Start editing an activity
Create new activities
You can create new activities directly on the resources. Therefore
- double click onto a specific point in the resource timeline, an empty rectangle appears

Define slot for new activity
- drag it to the desired time slot and increase / decrease its length through moving the left / right border of the rectangle
- click right mouse, a menu appears which provides viable activity types for this resource
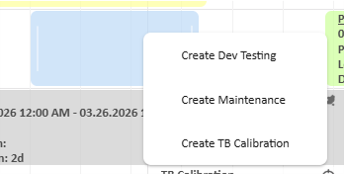
Select activity type
A dialog in edit mode will open.
Assign / unassign activities from a pool
Click on the right side the panel "Assign activities" to open a table with activities which might be assigned to the resources. The activities are already rendered the way they will later appear in the board.
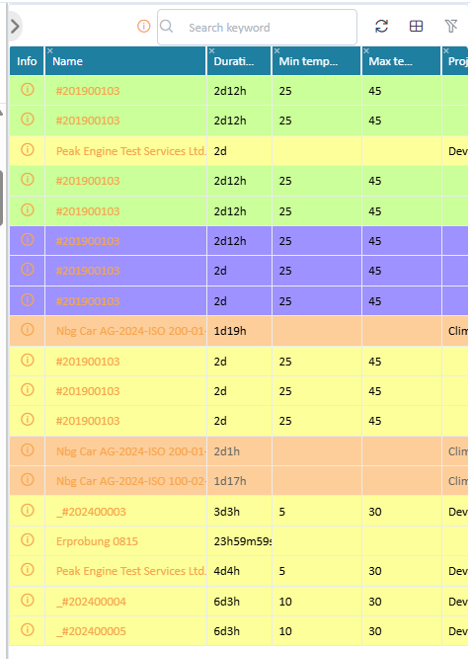
Assign actvity panel
Customize your activity pool
To adjust the right view for you can
- choose the information you need as columns
- set filters in column header
- use a key word for further filtering
- sort the data
Assign a resource
Assigning a resource from the activity pool is straight forward: Select a column in the table and drag it onto a time slot in the planning board. When dragging a rectangle appears which has the size of the needed time slot.
Assign actvity panel
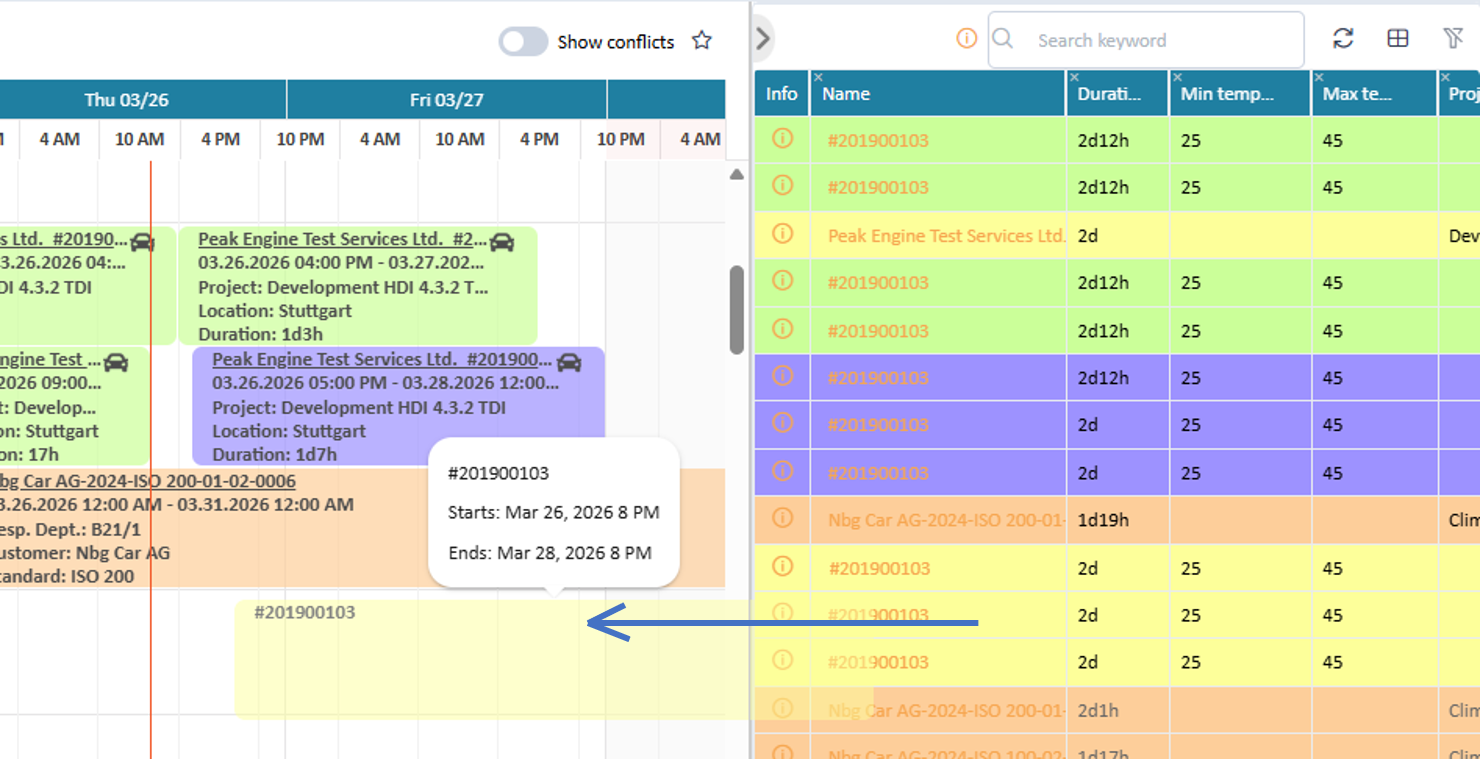
Unassign a resource
Right click onto an activity in the planning board and choose the menu item "remove resource". The resource assignment will be removed and the slot is empty afterward.
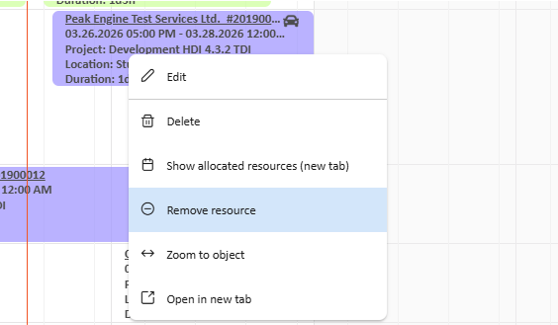
Remove resource assignment
Working on scheduling conflicts
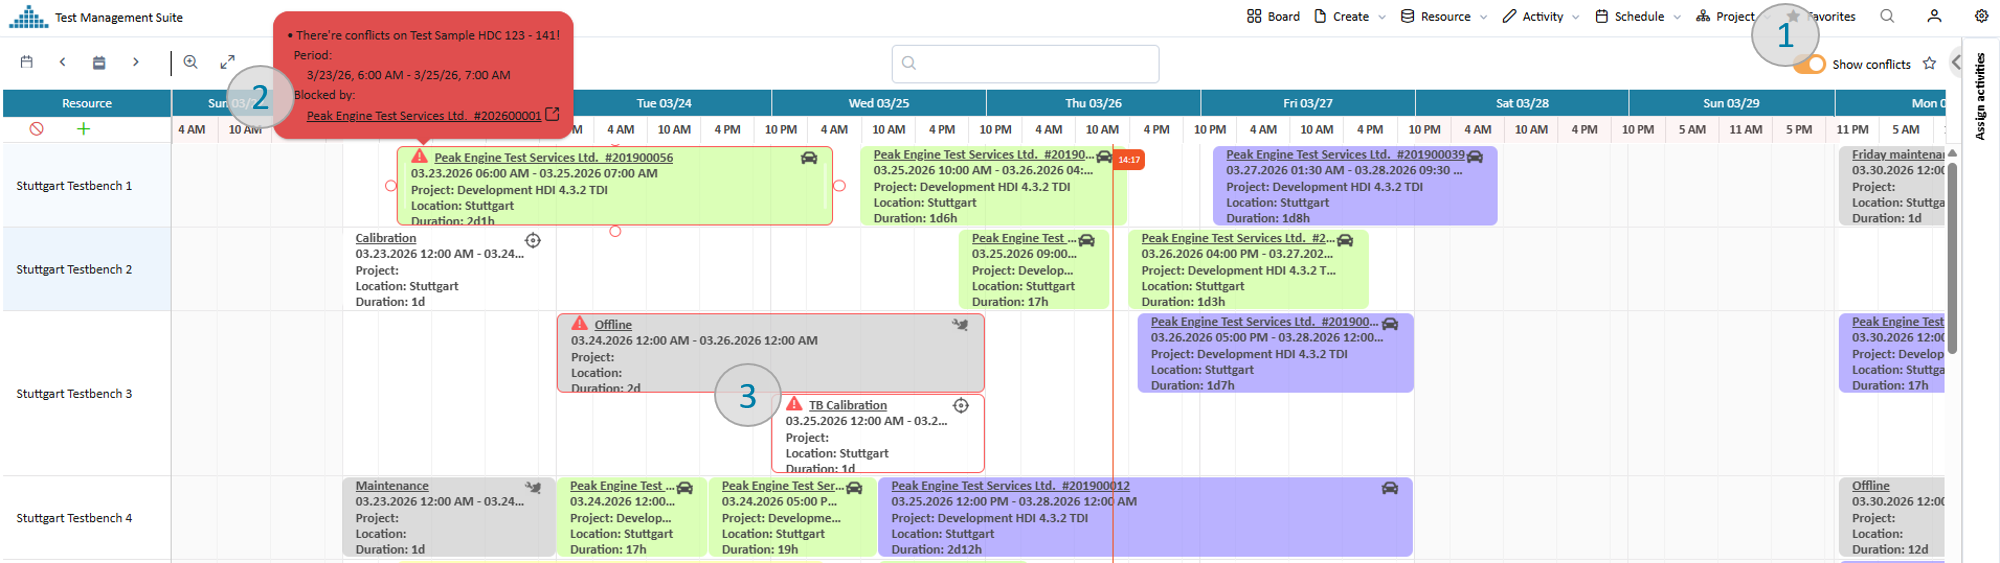
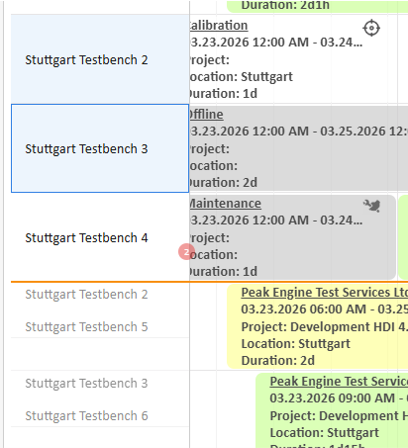
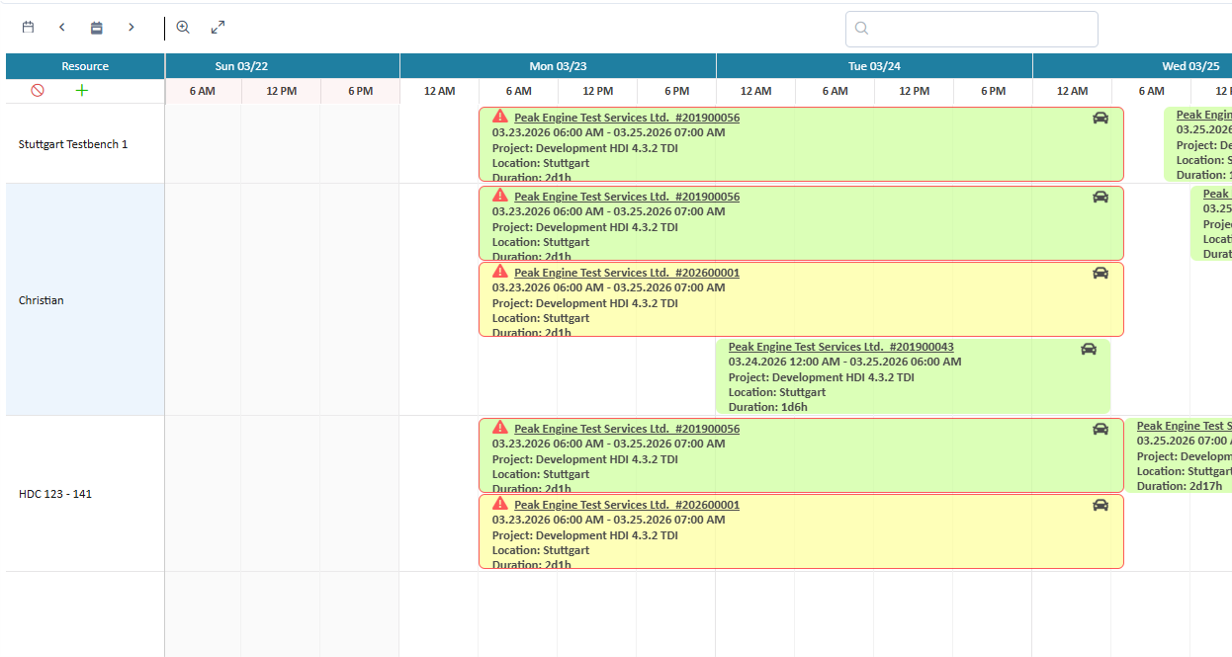
Working with conflicts
When switching on "show conflicts" (pic 1) the system marks activities with a red frame if there is a scheduling conflict in at least one of the resources assigned to it. This can be a resource of the board but also a resource which is not in the board planning scope. E.g. the conflict in pic 2 appears in a test sample which is not shown on this board, while the conflict in pic 3 is obvious on the resource test bench.
Hovering over the symbol will provide a message which explains where the conflict comes from and provide a link to activities which try to use the same resources. Clicking the link will open the detail page of the related activity in a new browser tab.
Helpful is to get an overview over all resources assigned to the activity therefore right click the activity and choose the menu item "show allocated resources".
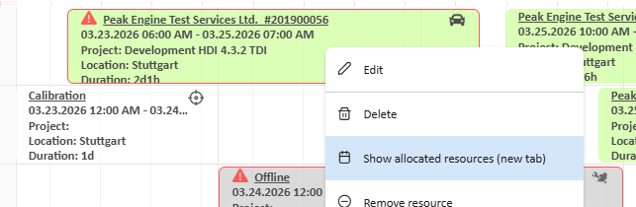
Show already assigned resources
This will open a new browser tab showing the schedule of all assigned resources, in this example test bench, test sample and test engineer:
Overview of all assigned resources
Using this view helps to see the source of conflicts and adjust the planning.
Store and reuse your settings
You can store your current settings as a favorite, pressing the button. After saving the button will change to to mark that you are working within a favorite.
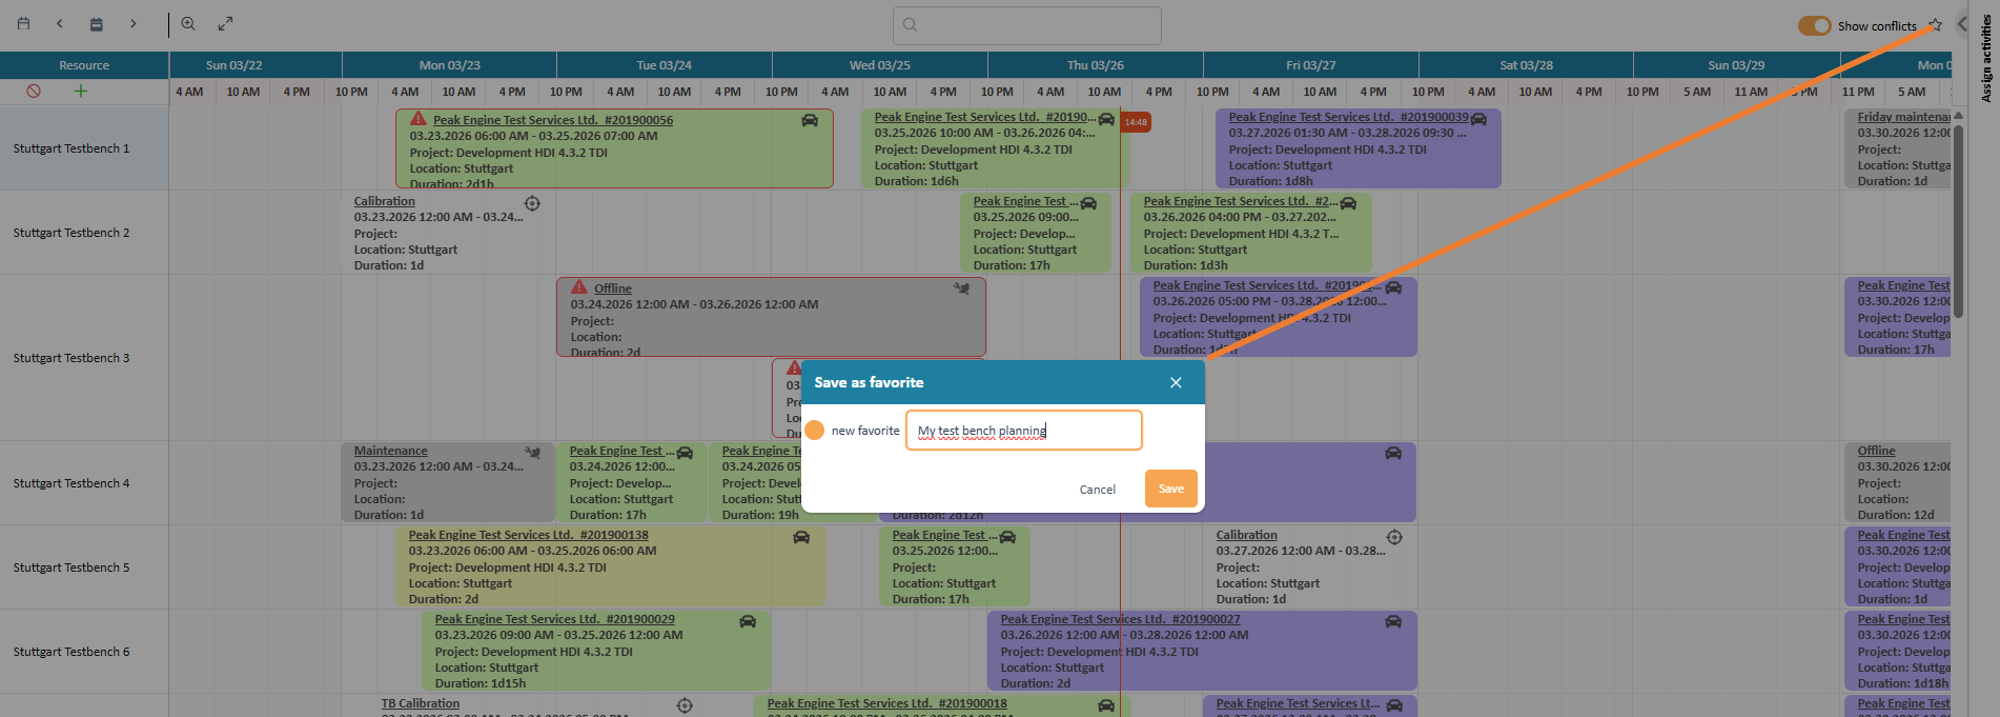
Save settings as favorite
Following information will be stored:
- Visible time range
- Defined resources as base of the timelines
- Conflict on / off
- Assign table panel open / closed and if open the divider location
- Table columns and filters in the assign table panel